Project Overview
The Overview page for a project contains all the basic information on the selected project.
At the top of the page you will find some charts to help understand the scope of the project. On the left is a bar chart that shows the top data types, top tags, and top contributors across all the datasets in the project, You can click the buttons below the plot to toggle between these options and you can click on any of the bars to be taken to the datasets page filtered on that selection. On the right is a chart showing the costs of the project broken down into storage, infrastructure, compute, and notebook-related costs.
At the bottom of the page you will find buttons to view the datasets, notebooks, samples, pipeline references, users, and costs associated with the project. You can also access these pages through Cirro's sidebar. Below the page links are three sections with useful information for navigating the project's details.
Project Tags
Projects can have tags attached to them that make them easier to organize and search for. To add a tag to a project, click the "Edit Tags" button. This will open a pop up where you can enter new tags and remove existing tags.

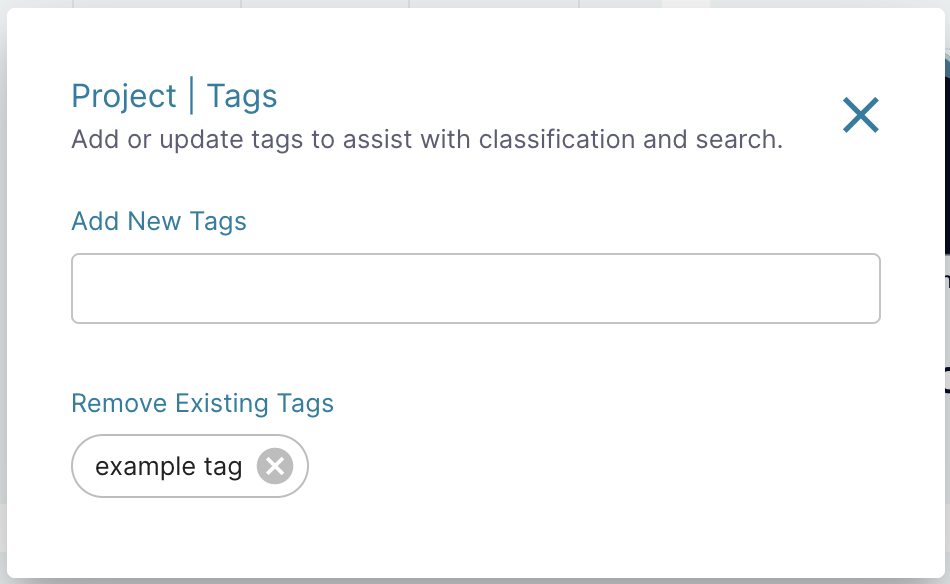
A project's tags are visible in the Edit Tags pop up and also on the main Projects page, next to the project's name.
Editing a Project
At the top of the project's Overview page, you will see a button for "Edit Project" that opens a pop up. If you do not have permission to perform these operations, the button will not be available.

The "Edit Project" pop up contains the following entries:
- Project Name: Choose a unique name for your project.
- Project Description: (Optional) A 1-2 sentence description of your project.
- Contact Name: The name of the person that will be contacted with any issues about that project.
- Contact Email: The email of your contact person.
- Contact Organization: The affiliation of your contact person (e.g. Fred Hutch, University of Washington).
- Contact Phone: (Optional) The phone number of your contact person.
- Billing Account: Select the billing account you want to charge for costs incurred in the project (e.g. data storage and running pipelines).
- Budget Amount: The amount of money allowed to be spent for the selected billing period.
- Budget Period: The time period you want associated with your budget amount. This can be monthly, quarterly, or annually.
- Deleted Dataset Retention: The number of days to keep deleted datasets before being permanently erased.
- Maximum number of vCPUs: The maximum number of compute cores you can launch at once for pipelines when you're doing batch processing. 300 is a logical value for most projects, but if you want to run highly parallelized work you may want to add more. Feel free to contact the Cirro team with questions.
- Allow SFTP Access: Check to allow users to access the project using SFTP.
Deleting a Project
To delete a project, contact the Cirro team.
SFTP Access
At the top of the project's Overview page, you will see a button for "SFTP Access" that opens a pop up. This button will only be available if the project has SFTP access allowed.
To create a temporary username and password for accessing the project via SFTP, click the "Generate" button in the pop up which will create a username and password. Copy the entries by clicking on the ![]() icon. Be sure to copy both entries as they will not be saved after you close the pop up.
icon. Be sure to copy both entries as they will not be saved after you close the pop up.
If you need the SFTP endpoint for Cirro, you can find it to the right of the "Generate" button. You can click on the text to copy it.